My intention for this project was to capture the way sunlight illuminates clouds during a sunset.
~~~
Ideation # 1:
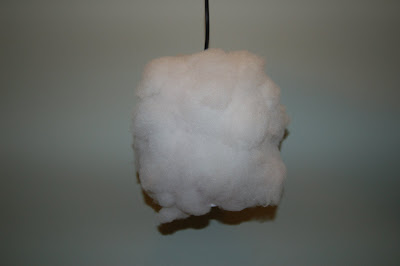


I made my luminaire with white printer paper, watercolors, and polyester fiberfil for stuffing pillows. In this first ideation, I painted three 8.5" by 11" pieces of paper with watercolors (yellow, purple, and red), formed them into a spherical shape with glue and other strips of paper, and used spray adhesive to attach the polyester fiberfil to the outside. The paint is only on the inside, facing the bulb. I left the bottom of the luminaire open, so the lightbulb could be removed.
I was very happy with the effect, but the luminaire resembled cotton candy moreso than it did a sunset. Not my intention.
~~~
Ideation # 2:

 For the second ideation, I ditched the purple and stuck with the yellow and red, but I also blended them to make orange. I wanted to achieve a gentle transition of color from yellow at the top to red at the bottom, but didn't succeed. I also added more paper at the bottom, intending to make it easier to close the bottom of the luminaire off with string, which could be removed if so desired. However, I didn't think to paint the extra paper, which became obvious when I saw the luminaire in the dark.
~~~
Ideation # 3:
Ideation # 3:

 For my final ideation, I was very careful to make the transition of color as gradual as possible, making the yellow lighter at the top. I was pleasantly surprised at the results.
 Unfortunately, a photograph doesn't capture that transition very well. In real life, the luminaire is almost white at the top and gradually deepens to a richer yellow, then to orange, then finally to a vibrant reddish orange at the bottom. I tied the end off with a twistie tie, which worked better than a rubber band but still not good enough. The issue of closing the bottom of the luminaire in a non-permanent way is the one unresolved aspect of the project.
~~~
Project drawing:

Materials: canson paper, pastels, and foam board.


.jpg)
.jpg)


 First ideation.


